2021-07-24 17:35:09 -04:00
|
|
|
# pyceo
|
2021-11-27 18:01:18 -05:00
|
|
|
[](https://ci.csclub.uwaterloo.ca/public/pyceo)
|
2021-08-19 22:24:55 -04:00
|
|
|
|
2022-01-02 16:06:37 -05:00
|
|
|
|
2022-01-02 16:06:03 -05:00
|
|
|
|
2021-08-19 21:41:50 -04:00
|
|
|
CEO (**C**SC **E**lectronic **O**ffice) is the tool used by CSC to manage
|
2021-10-23 10:23:43 -04:00
|
|
|
club accounts and memberships. See [docs/architecture.md](docs/architecture.md) for an
|
2021-08-19 21:41:50 -04:00
|
|
|
overview of its architecture.
|
2021-07-24 17:35:09 -04:00
|
|
|
|
2021-10-23 10:23:43 -04:00
|
|
|
The API documentation is available as a plain HTML file in [docs/redoc-static.html](docs/redoc-static.html).
|
|
|
|
|
|
2021-07-24 17:35:09 -04:00
|
|
|
## Development
|
2023-12-03 23:29:11 -05:00
|
|
|
### Podman
|
2021-09-17 22:39:27 -04:00
|
|
|
If you are not modifying code related to email or Mailman, then you may use
|
2023-12-03 23:29:11 -05:00
|
|
|
Podman containers instead, which are much easier to work with than the VM.
|
2021-09-17 22:39:27 -04:00
|
|
|
|
2023-12-03 23:29:11 -05:00
|
|
|
If you are using Podman, make sure to set the `DOCKER_HOST` environment variable
|
|
|
|
|
if you have not done so already:
|
|
|
|
|
```bash
|
|
|
|
|
# Add the following to e.g. your ~/.bashrc
|
|
|
|
|
export DOCKER_HOST=unix://$XDG_RUNTIME_DIR/podman/podman.sock
|
|
|
|
|
```
|
|
|
|
|
The Podman socket also needs to be running:
|
|
|
|
|
```bash
|
|
|
|
|
# Enabled by default on Debian, but not on Fedora
|
|
|
|
|
systemctl --user enable --now podman.socket
|
|
|
|
|
```
|
|
|
|
|
|
|
|
|
|
First, create the container images:
|
2021-09-17 22:39:27 -04:00
|
|
|
```sh
|
2023-12-03 23:29:11 -05:00
|
|
|
scripts/build-all-images.sh
|
2021-09-17 22:39:27 -04:00
|
|
|
```
|
|
|
|
|
Then bring up the containers:
|
|
|
|
|
```sh
|
2023-12-03 23:29:11 -05:00
|
|
|
docker-compose up -d
|
2021-09-17 22:39:27 -04:00
|
|
|
```
|
|
|
|
|
This will create some containers with the bare minimum necessary for ceod to
|
|
|
|
|
run, and start ceod on each of phosphoric-acid, mail, and coffee container.
|
|
|
|
|
You can check the containers status using:
|
|
|
|
|
```sh
|
|
|
|
|
docker-compose logs -f
|
|
|
|
|
```
|
|
|
|
|
|
|
|
|
|
To use ceo, run the following:
|
|
|
|
|
```sh
|
|
|
|
|
docker-compose exec phosphoric-acid bash
|
|
|
|
|
su ctdalek
|
|
|
|
|
. venv/bin/activate
|
|
|
|
|
python -m ceo # the password is krb5
|
|
|
|
|
```
|
|
|
|
|
This should bring up the TUI.
|
|
|
|
|
|
|
|
|
|
Normally, ceod should autoamtically restart when the source files are changed.
|
|
|
|
|
To manually restart the service, run:
|
|
|
|
|
```sh
|
|
|
|
|
docker-compose kill -s SIGHUP phosphoric-acid
|
|
|
|
|
```
|
|
|
|
|
|
|
|
|
|
To stop the containers, run:
|
|
|
|
|
```sh
|
|
|
|
|
docker-compose down
|
|
|
|
|
```
|
|
|
|
|
Alternatively, if you started docker-compose in the foreground, just press Ctrl-C.
|
|
|
|
|
|
|
|
|
|
### VM
|
|
|
|
|
If you need the full environment running in VM, follow the guide on
|
2021-07-24 17:35:09 -04:00
|
|
|
[syscom dev environment](https://git.uwaterloo.ca/csc/syscom-dev-environment).
|
|
|
|
|
This will setup all of the services needed for ceo to work. You should clone
|
2021-08-19 21:41:50 -04:00
|
|
|
this repo in the phosphoric-acid container under ctdalek's home directory; you
|
|
|
|
|
will then be able to access it from any container thanks to NFS.
|
2021-07-24 17:35:09 -04:00
|
|
|
|
2021-08-19 21:41:50 -04:00
|
|
|
Once you have the dev environment setup, there are a few more steps you'll
|
|
|
|
|
need to do for ceo.
|
|
|
|
|
|
|
|
|
|
#### Kerberos principals
|
|
|
|
|
First, you'll need `ceod/<hostname>` principals for each of phosphoric-acid,
|
|
|
|
|
coffee and mail. (coffee is taking over the role of caffeine for the DB
|
|
|
|
|
endpoints). For example, in the phosphoric-acid container:
|
|
|
|
|
```sh
|
|
|
|
|
kadmin -p sysadmin/admin
|
|
|
|
|
<password is krb5>
|
|
|
|
|
addprinc -randkey ceod/phosphoric-acid.csclub.internal
|
|
|
|
|
ktadd ceod/phosphoric-acid.csclub.internal
|
|
|
|
|
```
|
|
|
|
|
Do this for coffee and mail as well. You need to actually be in the
|
|
|
|
|
appropriate container when running these commands, since the credentials
|
|
|
|
|
are being added to the local keytab.
|
|
|
|
|
On phosphoric-acid, you will additionally need to create a principal
|
|
|
|
|
called `ceod/admin` (remember to addprinc **and** ktadd).
|
|
|
|
|
|
|
|
|
|
#### Database
|
2021-08-29 13:08:35 -04:00
|
|
|
**Note**: The instructions below apply to the dev environment only; in
|
|
|
|
|
production, the DB superusers should be restricted to the host where
|
|
|
|
|
the DB is running.
|
|
|
|
|
|
|
|
|
|
Attach to the coffee container, run `mysql`, and run the following:
|
|
|
|
|
|
|
|
|
|
```
|
|
|
|
|
CREATE USER 'mysql' IDENTIFIED BY 'mysql';
|
|
|
|
|
GRANT ALL PRIVILEGES ON *.* TO 'mysql' WITH GRANT OPTION;
|
|
|
|
|
```
|
|
|
|
|
(In prod, the superuser should have '@localhost' appended to its name.)
|
|
|
|
|
|
|
|
|
|
Now open /etc/mysql/mariadb.conf.d/50-server.cnf and comment out the following line:
|
|
|
|
|
```
|
|
|
|
|
bind-address = 127.0.0.1
|
|
|
|
|
```
|
|
|
|
|
Then restart MariaDB:
|
|
|
|
|
```
|
|
|
|
|
systemctl restart mariadb
|
|
|
|
|
```
|
|
|
|
|
|
|
|
|
|
Install PostgreSQL in the container:
|
|
|
|
|
```
|
|
|
|
|
apt install -y postgresql
|
|
|
|
|
```
|
|
|
|
|
Modify the superuser `postgres` for password authentication and restrict new users:
|
|
|
|
|
```
|
|
|
|
|
su postgres
|
|
|
|
|
psql
|
|
|
|
|
|
|
|
|
|
ALTER USER postgres WITH PASSWORD 'postgres';
|
|
|
|
|
REVOKE ALL ON SCHEMA public FROM public;
|
|
|
|
|
GRANT ALL ON SCHEMA public TO postgres;
|
|
|
|
|
```
|
|
|
|
|
Create a new `pg_hba.conf`:
|
|
|
|
|
```
|
|
|
|
|
cd /etc/postgresql/<version>/<branch>/
|
|
|
|
|
mv pg_hba.conf pg_hba.conf.old
|
|
|
|
|
```
|
|
|
|
|
```
|
|
|
|
|
# new pg_hba.conf
|
|
|
|
|
# TYPE DATABASE USER ADDRESS METHOD
|
|
|
|
|
local all postgres peer
|
|
|
|
|
host all postgres 0.0.0.0/0 md5
|
|
|
|
|
|
|
|
|
|
local all all peer
|
|
|
|
|
host all all localhost md5
|
|
|
|
|
|
2021-09-11 13:33:43 -04:00
|
|
|
local sameuser all peer
|
2021-08-29 13:08:35 -04:00
|
|
|
host sameuser all 0.0.0.0/0 md5
|
|
|
|
|
```
|
|
|
|
|
**Warning**: in prod, the postgres user should only be allowed to connect locally,
|
|
|
|
|
so the relevant snippet in pg_hba.conf should look something like
|
|
|
|
|
```
|
|
|
|
|
local all postgres md5
|
|
|
|
|
host all postgres localhost md5
|
|
|
|
|
host all postgres 0.0.0.0/0 reject
|
|
|
|
|
host all postgres ::/0 reject
|
|
|
|
|
```
|
|
|
|
|
Add the following to postgresql.conf:
|
|
|
|
|
```
|
|
|
|
|
listen_addresses = '*'
|
|
|
|
|
```
|
|
|
|
|
Now restart PostgreSQL:
|
|
|
|
|
```
|
|
|
|
|
systemctl restart postgresql
|
|
|
|
|
```
|
|
|
|
|
**In prod**, users can login remotely but superusers (`postgres` and `mysql`) are only
|
|
|
|
|
allowed to login from the database host.
|
2021-08-19 21:41:50 -04:00
|
|
|
|
2021-08-22 01:44:41 -04:00
|
|
|
#### Mailman
|
|
|
|
|
You should create the following mailing lists from the mail container:
|
|
|
|
|
```sh
|
|
|
|
|
/opt/mailman3/bin/mailman create syscom@csclub.internal
|
|
|
|
|
/opt/mailman3/bin/mailman create syscom-alerts@csclub.internal
|
|
|
|
|
/opt/mailman3/bin/mailman create exec@csclub.internal
|
|
|
|
|
/opt/mailman3/bin/mailman create ceo@csclub.internal
|
|
|
|
|
```
|
|
|
|
|
See https://git.uwaterloo.ca/csc/syscom-dev-environment/-/tree/master/mail
|
|
|
|
|
for instructions on how to access the Mailman UI from your browser.
|
|
|
|
|
|
|
|
|
|
If you want to actually see the archived messages, you'll
|
|
|
|
|
need to tweak the settings for each list from the UI so that non-member
|
|
|
|
|
messages get accepted (by default they get held).
|
|
|
|
|
|
|
|
|
|
|
2021-08-19 21:41:50 -04:00
|
|
|
#### Dependencies
|
2021-07-24 17:35:09 -04:00
|
|
|
Next, install and activate a virtualenv:
|
|
|
|
|
```sh
|
2021-08-29 13:08:35 -04:00
|
|
|
sudo apt install libkrb5-dev libpq-dev python3-dev
|
2021-07-24 17:35:09 -04:00
|
|
|
python3 -m venv venv
|
|
|
|
|
. venv/bin/activate
|
|
|
|
|
pip install -r requirements.txt
|
|
|
|
|
pip install -r dev-requirements.txt
|
|
|
|
|
```
|
|
|
|
|
|
2021-09-17 22:39:27 -04:00
|
|
|
#### Running the application
|
2021-08-19 21:41:50 -04:00
|
|
|
ceod is a distributed application, with instances on different hosts offering
|
|
|
|
|
different services.
|
2021-07-24 17:35:09 -04:00
|
|
|
Therefore, you will need to run ceod on multiple hosts. Currently, those are
|
|
|
|
|
phosphoric-acid, mail and caffeine (in the dev environment, caffeine is
|
|
|
|
|
replaced by coffee).
|
|
|
|
|
|
2021-08-19 21:41:50 -04:00
|
|
|
To run ceod on a single host (as root, since the app needs to read the keytab):
|
2021-07-24 17:35:09 -04:00
|
|
|
```sh
|
|
|
|
|
export FLASK_APP=ceod.api
|
2023-07-31 19:27:45 -04:00
|
|
|
export FLASK_DEBUG=true
|
2021-07-24 17:35:09 -04:00
|
|
|
flask run -h 0.0.0.0 -p 9987
|
|
|
|
|
```
|
|
|
|
|
|
|
|
|
|
Sometimes changes you make in the source code don't show up while Flask
|
2023-12-03 23:29:11 -05:00
|
|
|
is running. Stop the flask app (Ctrl-C), run `scripts/clear_cache.sh`, then
|
2021-07-24 17:35:09 -04:00
|
|
|
restart the app.
|
|
|
|
|
|
2021-08-18 15:39:14 -04:00
|
|
|
## Interacting with the application
|
2021-09-17 22:39:27 -04:00
|
|
|
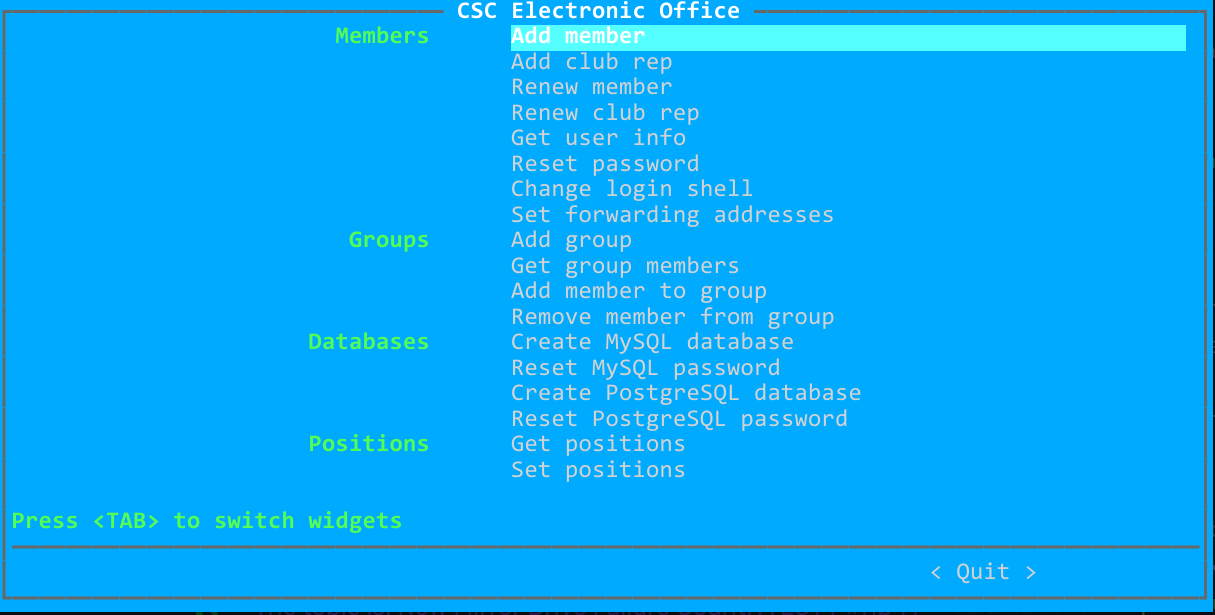
To use the TUI:
|
|
|
|
|
```
|
|
|
|
|
python -m ceo
|
|
|
|
|
```
|
|
|
|
|
To use the CLI:
|
|
|
|
|
```
|
|
|
|
|
python -m ceo --help
|
|
|
|
|
```
|
|
|
|
|
|
|
|
|
|
Alternatively, you may use curl to send HTTP requests.
|
2021-07-24 17:35:09 -04:00
|
|
|
|
|
|
|
|
ceod uses [SPNEGO](https://en.wikipedia.org/wiki/SPNEGO) for authentication,
|
|
|
|
|
and TLS for confidentiality and integrity. In development mode, TLS can be
|
|
|
|
|
disabled.
|
2021-08-18 15:39:14 -04:00
|
|
|
|
2021-07-24 17:35:09 -04:00
|
|
|
First, make sure that your version of curl has been compiled with SPNEGO
|
|
|
|
|
support:
|
|
|
|
|
```sh
|
|
|
|
|
curl -V
|
|
|
|
|
```
|
|
|
|
|
Your should see 'SPNEGO' in the 'Features' section.
|
|
|
|
|
|
2022-10-12 01:56:54 -04:00
|
|
|
Here's an example of making a request to add a user (in the Docker container):
|
2021-07-24 17:35:09 -04:00
|
|
|
```sh
|
2022-10-12 01:56:54 -04:00
|
|
|
# If you're root, switch to the ctdalek user first
|
|
|
|
|
su ctdalek
|
|
|
|
|
# Get a Kerberos TGT (password is krb5)
|
2021-07-24 17:35:09 -04:00
|
|
|
kinit
|
2021-08-18 15:39:14 -04:00
|
|
|
# Make the request
|
2021-08-25 22:26:56 -04:00
|
|
|
curl --negotiate -u : --service-name ceod --delegation always \
|
2021-10-23 23:21:09 -04:00
|
|
|
-d '{"uid":"test_1","cn":"Test One","given_name":"Test","sn":"One","program":"Math","terms":["s2021"]}' \
|
2022-10-12 01:56:54 -04:00
|
|
|
-X POST http://phosphoric-acid:9987/api/members
|
|
|
|
|
|
|
|
|
|
# To delete the user:
|
|
|
|
|
curl --negotiate -u : --service-name ceod --delegation always \
|
|
|
|
|
-X DELETE http://phosphoric-acid:9987/api/members/test_1
|
|
|
|
|
|
|
|
|
|
# In prod, use the following base URL instead:
|
|
|
|
|
# https://phosphoric-acid.csclub.uwaterloo.ca:9987
|
2021-07-24 17:35:09 -04:00
|
|
|
```
|
2021-10-28 20:52:19 -04:00
|
|
|
|
|
|
|
|
## Packaging
|
2021-12-25 12:43:05 -05:00
|
|
|
See [PACKAGING.md](./PACKAGING.md).
|